Installation Instructions
- Install and activate the plugin.
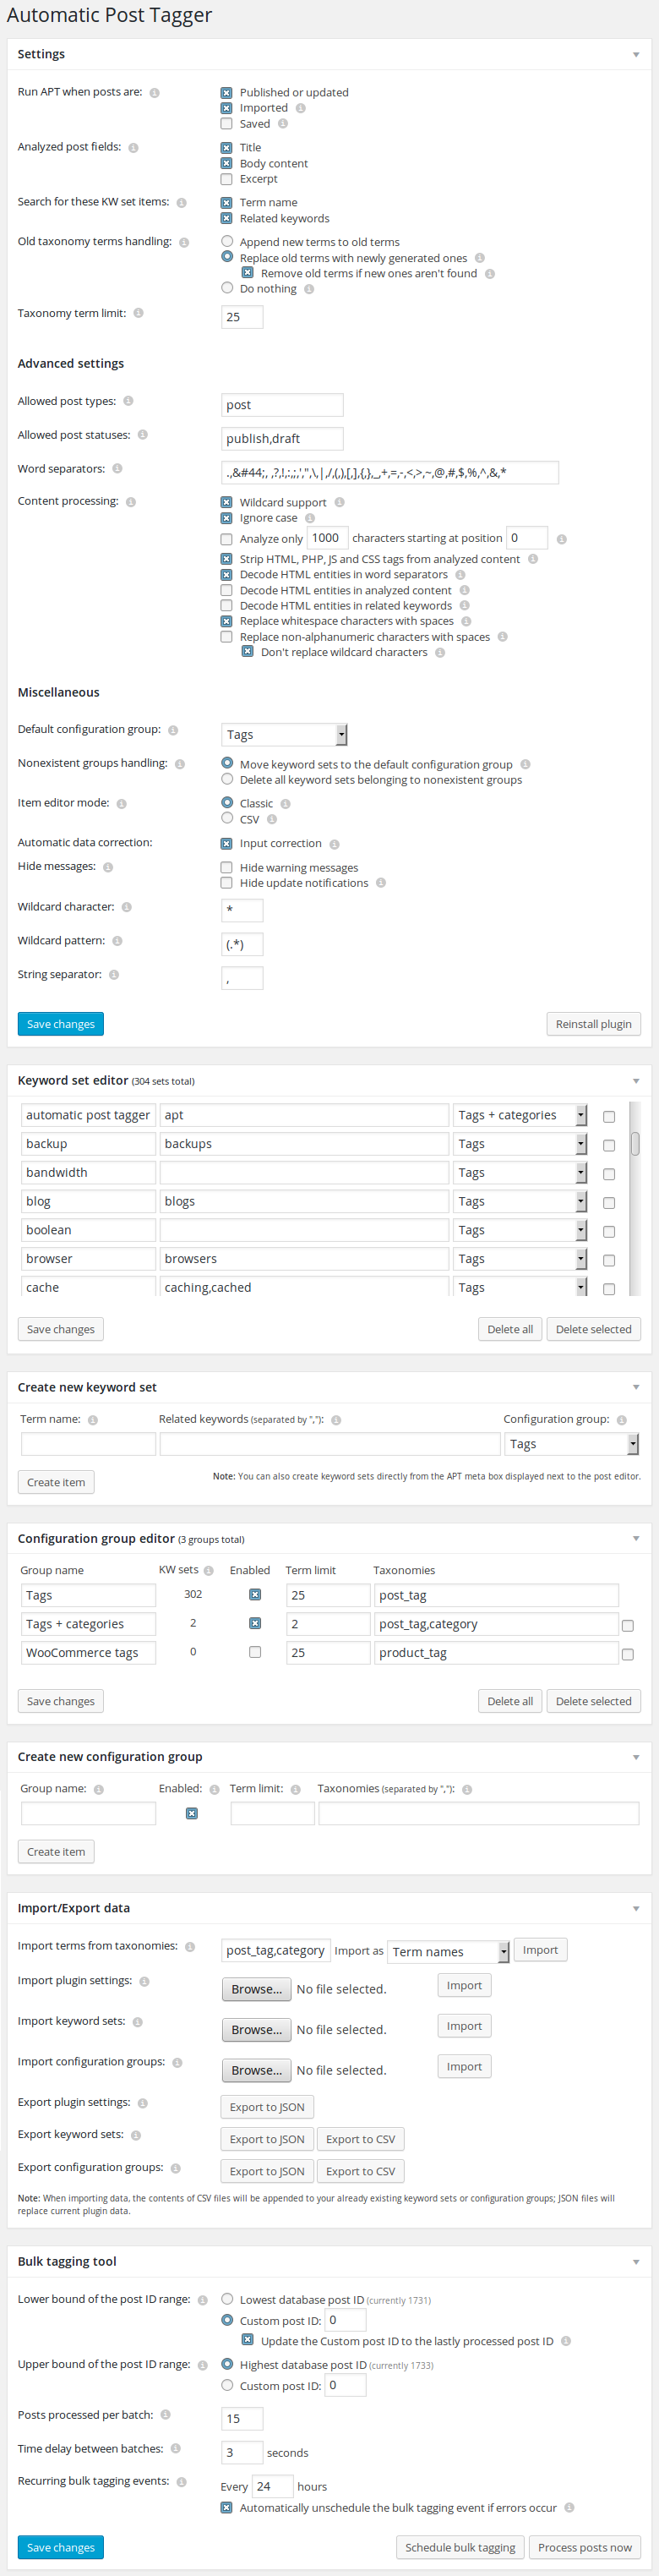
- Configure the plugin (Settings > Automatic Post Tagger).
- Create or import keyword sets. Term names represent taxonomy terms (tags by default) which will be added to posts when they or the keyword set’s Related keywords are found. Keyword sets can be categorized into custom Configuration groups with custom settings for selected keyword sets.
- Publish/import/save posts. You can also use the Bulk tagging tool to process all of your already existing posts.
#1: How to make the plugin add taxonomy terms to drafts as well?
By default only newly published and imported posts are automatically tagged. If you want to see the plugin in action when writing new posts or editing drafts, enable the option “Run APT when posts are: Saved” and add the post status “draft” to the option “Allowed post statuses”.
#2: PHP’s “max_input_vars” limit has been exceeded and I can’t edit or delete keyword sets/configuration groups.
You may encounter this problem if the plugin stores a lot of keyword set/configuration group items in the database and your PHP configuration prevents input fields from being submitted if there’s too many of them. You can fix this by doing one of the following:
- Change the “Item editor mode” to “CSV”.
- If you can modify your PHP configuration, change the variable “max_input_vars” in your php.ini file to a higher value (1000 is usually the default value).
#3: I’m getting the “Maximum execution time of XY seconds exceeded” error when tagging posts.
This might happen if your posts are large or you have a lot of keyword sets in the database. Here’s what you can do:
- Remove some of your word separators (or enable the option “Replace non-alphanumeric characters with spaces” to ignore them completely).
- Enable the option “Analyze only XY characters starting at position XY”.
- Lower the number of posts tagged per cycle when using the Bulk tagging tool.
- If you can modify your PHP configuration, change the variable “max_execution_time” in your php.ini file to a higher value (30 is usually the default value).
#4: Which post import tools are compatible with APT?
So far APT has been successfully tested with the following:
If your post import tool/plugin is not compatible with APT, you can still set up recurring bulk tagging events to regularly process new posts.
#5: Can APT tag posts written in Chinese, Japanese, Korean and similar languages?
Yes. You will have to enclose every single logogram used as a related keyword in wildcards or disable automatic input correction and replace all word separators with one string separator. See this page for more information.
#6: How to add categories to posts?
Add the taxonomy “category” to configuration groups of your choice.
#7: How to add tags and categories to WooCommerce products?
Add the post type “product” to the option “Allowed post types”, enable the option “Run APT when posts are: Saved” and add taxonomies “product_tag” and “product_cat” to configuration groups of your choice.